Showing posts with label rag rug. Show all posts

Thursday, May 4, 2017

Circle Rag Rug DIY

Okay as promised here is my circle rag rug!

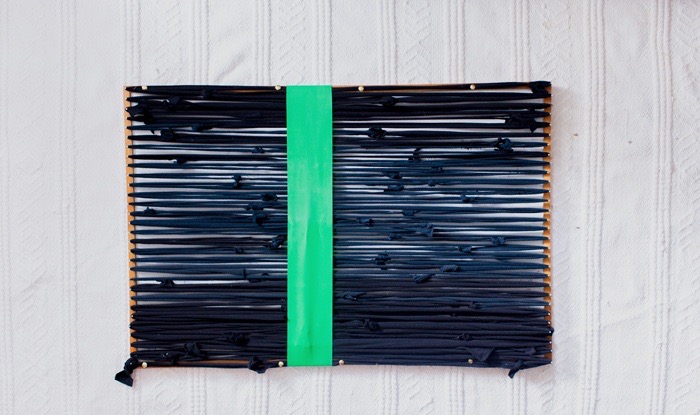
This mat involved cutting your old rags into roughly one inch strips (I did this really roughly!) and then plaiting these strips together - you can see the ball of plaited material over on the left. I also used a combo of different materials, old clothes, shirts, bed sheets and the rug turned out fine :)

After plaiting all your rags, it's time to sew! Choose a zigzag stitch on your sewing machine and keep sewing round and round, over and over again.  This project is definitely on the longer end, it was a good week of watching trash tv whilst plaiting and then a couple of days of sewing for me to complete it. Also when I first tried to sew it on my machine I thought it was too thick so I spent the first night hand sewing (I didn't get very far!) and the next day (
determined not to spend months stuck hand sewing!) I successfully jammed the plaits under the sewing machine foot - hooray!

Again Peachy killed it with her project supervisor status :)

In the above photos you can see how its a bit lumpy in the blue/purple zone this was before I had perfected my method, which simple involved, pining (with pins!) one circle at a time + ironing it all flat and then sewing that ring before repeating the process.  I also used a bed to make sure the mat stayed flat whilst sewing too :)

As I sewed I also squished both sides of the plaits together as they ran through the machine so the zigzag would catch both sides :)

Getting there!

and complete - hooray!

It's now living in our lounge room and it's so nice to have a little bit of warmth against our wooden floor boards, especially heading towards winter :)

I'm going to keep collecting old rags for future projects which lets me feel not so bad rejecting clothes from my wardrobe knowing they have a good future use!
read more "Circle Rag Rug DIY"

Thursday, April 20, 2017

Rag Rug Diy

So our rag bag was getting out of control. One day I went through the bag and cut up lots of Chux sized cleaning cloths (to use instead of paper towel) which I've even been re-washing and re-using if they are not too dirty - either making me awesome or crazy :p So even after cutting up the cloths there was still lots of old clothes and sheets left over. I did some googling and figured I could put together a pretty simple loom using nails and an unwanted white board I had lying around to help make a mat!

I first needed to cut everything into strips, I didn't measure I just estimated and ripped and cut!

The cats loved this rag pile and I almost considered donating it to them but realised if I did that they'd probably loose interest :p

I had lots of this black stretchy material and I wanted my rug to be on the darker side, so I used that as my length otherwise known as the warp. I also used this tutorial to tie my strips of fabric together as I went. You just want to make sure that wherever you have your fabrics joining together as a knot that the knot doesn't sit on an edge because you'll find it it sticking out on your finished rug.

The first stage is easy you just start at the top left nail and go up and down until you reach the bottom right nail and make another knot to secure it. You can see above a green band, I thought this would help make sure the rug didn't sink in when I got to weaving the middle - not sure if it helped or not?!? I also tacked the side pieces down (see those little golden dots) and I would definitely recommend doing that!  I also realised I'm saying top and bottom when all my photos show the loom on it's side but yes, please use your imagination there and flip the loom so it's standing tall!


The weaving process involved grabbing a strip of material, one at a time and weaving in and out of the black warp material whilst watching trashie tv.  When a strip of material came to an end I would simple grab another strip and tie it together using that same tutorial as above. I tried to think about colours and match the top and bottom, so I would do one block of colour which I then repeated at the other end - I may of over thought things! One other tip is to push each row up as you go to keep things nice and tight with no gaps.

You then literally pull all the top loops and all the bottom loops off their nails and hey presto a rag rug! Because I used a lot of stretchy knit fabrics it did shrink significantly once off the mat but since my loom was pretty big, it became the perfect bathroom mat size! We actually had a shop bought rag rug already but holy moly this handmade version is so so soft! I thought it was just me but I remember Ben saying if felt like cotton wool buds the first time he tested it out.

I've since put it through the washing machine and I'm happy to report it held up fine, it did take a while to dry but other than that it's a-okay!

One last thing, I did notice the mat wasn't 100% even on the sides, it's actually just the first blocks of blue that stick out - maybe due to being at the ends of the looms and/or possibly a thicker or stretchier fabric?!? I'm not too phased but perhaps you could stick with one type of fabric to overcome thing :)

After making this rug I still had soooo many rags left over so I decided to make a round mat, it's currently in production so I'll make sure to share when it's done!
read more "Rag Rug Diy"