Showing posts with label diy. Show all posts

Thursday, March 15, 2018

Paper Making Kit

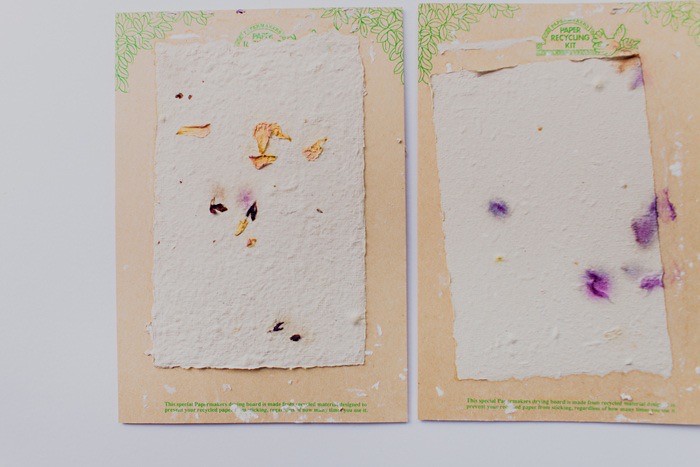
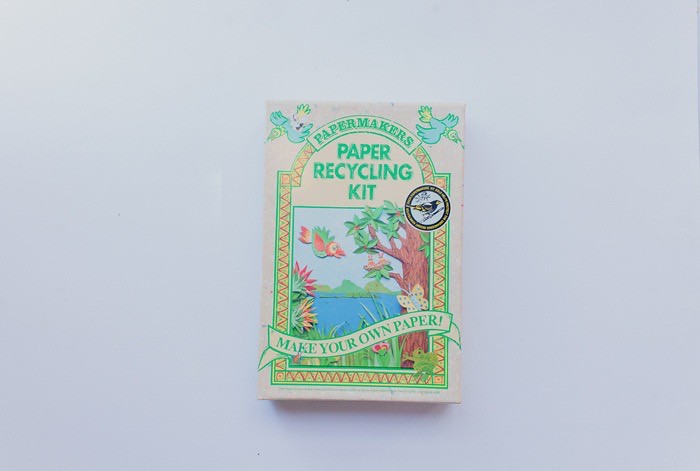
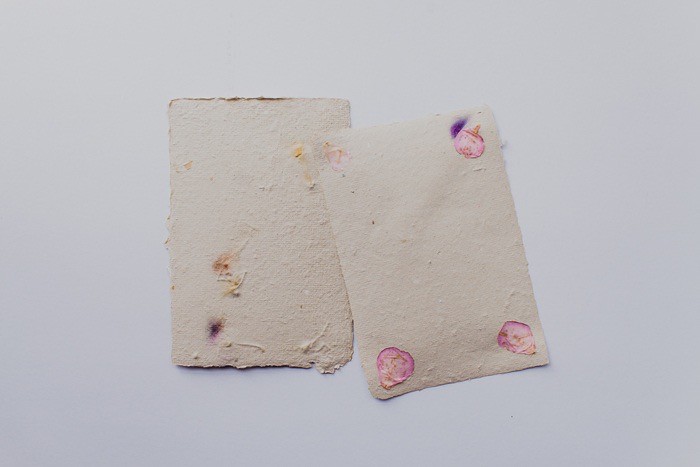
This year, although I'm not limiting myself to buying new things, I am trying to use things I've already bought, especially of the DIY variety :) With that in mind, I finally pulled out my paper making kit I bought from the thrift store many moons ago. OH gosh, after hunting down that post I realised it was four years ago!! Better late than never and I'm so glad I've started because it's so much fun! I've been saving every scrap of paper and even that process of recycling feels really good :)

My box that lives in my room and collects paper. 


You do need to rip the paper into stamp sized pieces so instead of leaving that untill I've amassed a full box I do it as soon as I add new paper to avoid that big job at the end!


Unfortunately this isn't really a tutorial because you do need the mesh sieve (see in the top of the photo) but more of a post to say 'you can totally start that DIY project you've been meaning to!!'.

I've also been saving the rose petals from the garden and drying them out

Also feels amazing to have a use for them - they are just too pretty and smell divine!

After blending up the paper and then sieving it, the pulp gets transfer to the drying boards.

So glad I finally got over the hump and dove in, sometimes it can be intimidating starting a new project!

 Yay for paper!
read more "Paper Making Kit"

Thursday, August 10, 2017

DIY wooden chopping board


This was a fun and basic wood project that sprung to mind from a desire to have my own wooden chopping board :) A quick google and then an 'a-ha' moment...wood scraps!

WHAT YOU NEED
- wood scraps (non-treated/hardwood)
- wood glue (non-toxic)
- clamps
- planer/sander/sand paper 

- saw
- mineral oil or equivalent


Ben and J had previously collected some tree pickets that had washed down the creek during some recent storms. I thought these would be great since they are hardwood and untreated :)  This DIY is really just a guide, you can use whatever appropriate wood scraps you have lying around!


The first step is to arrange the wood - I was mainly considering how the pieces sat together (trying to avoid gaps) rather then aesthetics but you may want to consider both!


Then it was just a matter of using some non-toxic wood glue and clamping the pieces together.  As you can see above, I had to do mine in stages. Whilst on my googling mission, I saw others using super long bar clamps (making me a little jealous) but using what you have can be cool too :)


After gluing and drying it's time to get your board nice and flat, this might just involve sanding but since my pieces of timber were a bit hodge-podge in size, I used my electric planer to get everything level and even - love that planer!


I then measured and marked my board to the dimensions I wanted, and cut off the excessive ends with a drop saw (a hand saw would be fine as well). Afterwards I gave the piece a nice sanding so everything was lovely and smooth to touch


Next is a fun bit - the oil coating (to season your board). Mineral oil seemed to be the most recommended oil out there but if you have a suggestion of something better, let me know in the comments! In Australia, Paraffin oil (I believe) is more widely known - I just picked up a bottle at my local chemist. Whatever oil you use just be conscious that it's non-toxic :)


I normally like my wood on the lighter side but this was a fun change!

The magic transformation! Make sure you use enough oil so that water will resist the board and you don't end up with moisture within. 

This diy took me about a week to complete (mostly just waiting for glue to dry). I love that you don't need a big chunk of wood to make a functioning board and that the end result is super pretty!


read more "DIY wooden chopping board"

Tuesday, May 9, 2017

bought/gift/made /09

Three awesome things to share today!

First up in the bought category an electric planer, which has made my woodworking game even more solid - heh! heh! :P :P


Continuing with the home beautification project - a garden hose holder (try saying that fast 5 times) Super simple but it beats a tangled mess of hose on the ground.


And to finish off, the cutest drawing from my cousin's little girl!

Can you spot Gremlin and Peachy?? :) :) So much love!!!
read more "bought/gift/made /09"

Thursday, May 4, 2017

Circle Rag Rug DIY

Okay as promised here is my circle rag rug!

This mat involved cutting your old rags into roughly one inch strips (I did this really roughly!) and then plaiting these strips together - you can see the ball of plaited material over on the left. I also used a combo of different materials, old clothes, shirts, bed sheets and the rug turned out fine :)

After plaiting all your rags, it's time to sew! Choose a zigzag stitch on your sewing machine and keep sewing round and round, over and over again.  This project is definitely on the longer end, it was a good week of watching trash tv whilst plaiting and then a couple of days of sewing for me to complete it. Also when I first tried to sew it on my machine I thought it was too thick so I spent the first night hand sewing (I didn't get very far!) and the next day (
determined not to spend months stuck hand sewing!) I successfully jammed the plaits under the sewing machine foot - hooray!

Again Peachy killed it with her project supervisor status :)

In the above photos you can see how its a bit lumpy in the blue/purple zone this was before I had perfected my method, which simple involved, pining (with pins!) one circle at a time + ironing it all flat and then sewing that ring before repeating the process.  I also used a bed to make sure the mat stayed flat whilst sewing too :)

As I sewed I also squished both sides of the plaits together as they ran through the machine so the zigzag would catch both sides :)

Getting there!

and complete - hooray!

It's now living in our lounge room and it's so nice to have a little bit of warmth against our wooden floor boards, especially heading towards winter :)

I'm going to keep collecting old rags for future projects which lets me feel not so bad rejecting clothes from my wardrobe knowing they have a good future use!
read more "Circle Rag Rug DIY"

Thursday, April 20, 2017

Rag Rug Diy

So our rag bag was getting out of control. One day I went through the bag and cut up lots of Chux sized cleaning cloths (to use instead of paper towel) which I've even been re-washing and re-using if they are not too dirty - either making me awesome or crazy :p So even after cutting up the cloths there was still lots of old clothes and sheets left over. I did some googling and figured I could put together a pretty simple loom using nails and an unwanted white board I had lying around to help make a mat!

I first needed to cut everything into strips, I didn't measure I just estimated and ripped and cut!

The cats loved this rag pile and I almost considered donating it to them but realised if I did that they'd probably loose interest :p

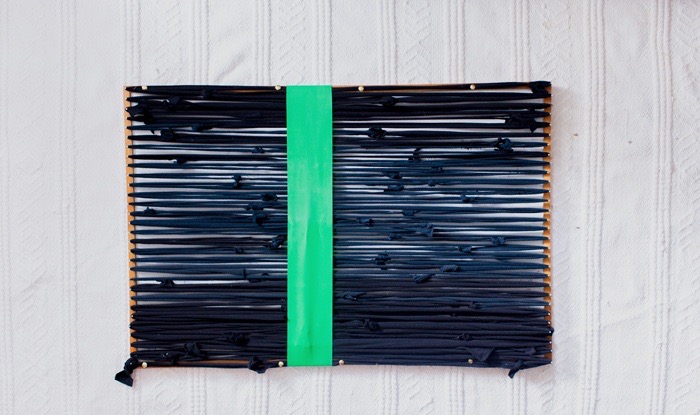
I had lots of this black stretchy material and I wanted my rug to be on the darker side, so I used that as my length otherwise known as the warp. I also used this tutorial to tie my strips of fabric together as I went. You just want to make sure that wherever you have your fabrics joining together as a knot that the knot doesn't sit on an edge because you'll find it it sticking out on your finished rug.

The first stage is easy you just start at the top left nail and go up and down until you reach the bottom right nail and make another knot to secure it. You can see above a green band, I thought this would help make sure the rug didn't sink in when I got to weaving the middle - not sure if it helped or not?!? I also tacked the side pieces down (see those little golden dots) and I would definitely recommend doing that!  I also realised I'm saying top and bottom when all my photos show the loom on it's side but yes, please use your imagination there and flip the loom so it's standing tall!


The weaving process involved grabbing a strip of material, one at a time and weaving in and out of the black warp material whilst watching trashie tv.  When a strip of material came to an end I would simple grab another strip and tie it together using that same tutorial as above. I tried to think about colours and match the top and bottom, so I would do one block of colour which I then repeated at the other end - I may of over thought things! One other tip is to push each row up as you go to keep things nice and tight with no gaps.

You then literally pull all the top loops and all the bottom loops off their nails and hey presto a rag rug! Because I used a lot of stretchy knit fabrics it did shrink significantly once off the mat but since my loom was pretty big, it became the perfect bathroom mat size! We actually had a shop bought rag rug already but holy moly this handmade version is so so soft! I thought it was just me but I remember Ben saying if felt like cotton wool buds the first time he tested it out.

I've since put it through the washing machine and I'm happy to report it held up fine, it did take a while to dry but other than that it's a-okay!

One last thing, I did notice the mat wasn't 100% even on the sides, it's actually just the first blocks of blue that stick out - maybe due to being at the ends of the looms and/or possibly a thicker or stretchier fabric?!? I'm not too phased but perhaps you could stick with one type of fabric to overcome thing :)

After making this rug I still had soooo many rags left over so I decided to make a round mat, it's currently in production so I'll make sure to share when it's done!
read more "Rag Rug Diy"

Thursday, March 9, 2017

Building A Desk - Part 3

Okay Part 1 covered the table top, Part 2 covered building of the legs and now with this final blog post I'm going to go over putting everything together. This last stage took me about a week to complete - lots of waiting for things to dry!


What you'll need


Paint of choice, roller (or paintbrush) and sealer (and brown paper) + a drop sheet and dust mask.


Cross-brace (Ikea's OBSERVATÖR)

STEPS

Painting
So this is pretty straight forward as you just need to paint your legs and table top the colour of your choice but I did learn some things along the way that I thought worthy of sharing


/Drop sheet is a must, no matter how neat you think your painting style is, you will most likely still get paint on the floor.  As you can see above I just used a couple of old bed sheets.

/Foam rollers work great! I initially used a brush which left noticeable brush marks before switching over to the roller

/ Work away from dust/debris – I firstly set up outside but since we just had our lawn mowed, tiny bits of grass kept flying onto my workspace so I moved inside and opened windows (plus wore a face mask!)

/Do many thin coats, not one thick coat! It's tempting to just slop it all on at once but you'll end up with a nicer finish if you paint and let it dry (boring!) and repeat until the desired opacity is achieved. I ended up doing around four coats.

/Cans are great for holding your pieces up off the floor and being able to do the sides!


Sealer
I let my pieces dry over 48 hours before putting a sealer on.  I used a satin varnish as I didn't want my desk too glossy just protected for everyday use. So the back of your varnish tin will usually tell you to sand between coats and I normally do this without questioning but because I was getting over this desk and ready for it to be done, I decided to google if I could get away with not sanding!  I ended up learning a few things and spoiler alert I did sand between coats :P

So, what I learnt was when you apply a coat sometimes little bits of dust get embedded or maybe even the varnish itself might clump together, so when you run your hand over your finish piece it won't be perfectly smooth.  As you add more layers these imperfections get amplified!  Now when I previously thought about sanding, I pictured rough sand paper but I stumbled across a forum that advocated some brown paper wrapped around a sanding block (or anything firm with a flat edge).  This was a total game changer for me, not only did it make sense it left a really nice finish.  I always wondered, the point of using rough sandpaper as it would seem to just wear away the previous coat :P  I now use the brown paper bag/paper trick every time I'm doing several coats whether it be paint or varnish and on any project.

I'd also read a few times that reason for sand-papering between coats was to have the next coat bond together with the last, promoting adhesion, so something to take into account as well.


Assembling


After many days of painting and waiting for things to dry, sealing and waiting, I finally moved the desk into my room and woohoo it fit!!

I moved everything on and noticed straight away that it wasn't as sturdy as my last desk. *gulp* I went on a google spree and found that Ikea sold a cheap ($5) brace that I could attach at the back between the two leg frames.  It took me a couple of weeks to visit ikea and once installed, I can say that it made a world of difference to the stability of the desk and the brace will be easy to remove when we find ourselves having to move again!


A final recommendation is to either wait a couple of weeks for the varnish to really cure or don't put anything on the desk that will leave a mark.  Although the 48 hours after the final varnish meant the desk felt very dry and non sticky to touch, I did notice my mouse pad left a little mark - thankfully easily cleaned and fixed with some plastic underneath.


It's been 3 weeks and I have to say, I love my desk and I'm really proud that everyday I'm working on something I put so much love into!

Extra special mention and shout out to the best project supervisor ever!


Thanks Peachy Girl!


Previous Links
Part 1 and Part 2

read more "Building A Desk - Part 3"

Wednesday, March 8, 2017

Building A Desk - THE LEGS - Part 2

If you missed it, Part 1 covered the table top of the desk and today we're covering the legs!  As I mentioned before, I wanted the desk to be easily dismantled for when I next move, so these legs are pretty basic and simply slot into the top :) The sturdy factor of the overall desk is about 7/10 but if don't need the ability to dismantle you could easily secure the legs to the table top for 10/10 sturdiness

Leg Inspiration - here and here

THE LEGS - PART 2 (3 days to complete)

What you'll need

Everything from Part 1 + Some brackets!


4 x sturdy brackets (I ended up using 4 more which I'll explain in a second)

STEPS 

Step /1 Measurements
Work out the height of your table. I used this site to work out the right dimensions for my height.  I then encountered that it wasn't possible to have the desk, quite the right height due to my chair height + wanting to avoid my knees hitting the desk so I gave myself a bit more height so my legs could fit under comfortably

Step /2 Measure Twice Cut Once
With your measurements above, cut your pieces down to size, you're going to be making 2 square frames and you need to know their height (gathered in step 1) and their width which will be dependent upon your table top's width (gathered in Part 1).  I actually cut my height pieces a little longer and as you'll see in part 5 this was a very lucky thing! But if you're not like me just take your time measuring and cutting correctly :P

Step  /3 Sand
When using reclaimed wood, the upside is that you may be able to get your pieces very cheap or free but if you want a professional looking finish you'll have to put in the time to sand your pieces down. A rustic look may be you thing though so potentially discard everything I just said :P

Step /4 Clamp and Screw the Frames
Using your 90 degree clamps build your frame minus the bottom board. Put some wood glue between the join, pre-drill a hole and then use a screw (remember, drill a hole a fraction bigger than the screw but the same length).

Step /5 Test and Correct
Temporarily put your frames (minus their bottom piece) into the underside of your table top to double check your measurements.  It was here I had realised one of my frames was going to be a fraction shorter than the other (luckily I had allocated extra length during step 2). For an even desk you definitely need both leg frames the exact same height so at this stage do your final cuts to make sure they both match.

Step /6 Finish the Square
Pre-drill and screw the final piece of wood to the leg frames to complete the square shape.

Step /8 Add Brackets
I added 2 brackets to each frame.  I initially thought I'd only need 2 for each frame and these would sit at the top, hidden by the table top but to make things sturdy I did need to make some adjustments in step 7 below!

Step /7 Test the Sturdiness
Once the two frames were finished I tested them again underneath the table top. I found the frames had a slight wobble so I went out and bought some longer screws (changing the 50mm lengths to 75mm) and re-screwed (plus re-glued) the four joins - I also added an extra set of brackets at the bottom corners of both frames. Learn from my mistakes here and it probably won't take you 3 days to complete :P

Step /8 Sand
Fill any holes (with either wood filler or wood glue + sawdust) and sand your leg frames (I ended up filling and sanding my legs around 4 times to make sure the end result would be beautiful! After this process make sure you give all your pieces a good wipe down ready for the painting stage!

In Part 3 I'm going to discuss all the final steps before your desk is ready to use!
read more "Building A Desk - THE LEGS - Part 2"

Tuesday, March 7, 2017

Building A Desk - THE TABLE TOP - Part 1

Loving my New Desk!

BUILDING A DESK I've been wanting to build myself a desk for a while now and after completing my bookcase I was pretty confident I could pull off a desk! I also decided to take photos of the process in case anyone else was interested in giving it a shot.  It's not the easiest thing but I felt so good after I had finished it! On wards to the tutorial! Part 2 and 3 to come!


Pre-planning phase
Decide on the style and function of your desk
My Goal – A simple desk that could be dismantled and that also used (mostly) materials I had on hand.

My old desk above (a lovely purchase from my parents in my teenage years) was chip board and had unfortunately seen better days. Since we're renters, I've had to disassemble that desk for moving days far too many times but knew this feature would be helpful again on moving day.

I then pinterested some styles; this top seemed do-able and I loved this style of square legs

Measure your space!

The corner space in my room meant a desk with the following dimensions (116cm x 70cm) would be perfect. Building your own custom desk also means you can make it the perfect height for you - something that excited me and my posture!
THE TABLE TOP - PART 1 (3 days to complete)

What you'll need
Wood measuring equipment - tape measure/ruler/pen/pencil/calculator


 Safety – ear plugs/dust mask/safety glasses


Drop saw, jigsaw or table saw OR if you're really game a simple hand saw


Chisel, sander (or sandpaper) + dust mask and plane


Wood glue + 4 x 90 degree clamps


Drill + appropriate sized drill bits


Gloves, screw driver, screws (and yup that's a gardening glove because I'm resourceful :P)


Nails + hammer


Sealer + wood filler (or wood glue + saved sawdust)


STEPS

Step /1 Measure Your Wood 

If you're using scrap wood the first thing you need to do is measure your wood. We have a lot of wood off-cuts and since recently dismantling our chicken coop some really nice sturdy pieces that I wanted to re-purpose. I needed to work out if the pieces I had would fit my space dimensions (you may need to slightly redesign if your pieces don't fit or consider buying new wood pieces for the project). Luckily after some measuring I was feeling confident my design dimensions would work with the pieces of wood I had on hand.

Step / 2 Mark and Cut your Pieces down to Size

Since working with reclaimed wood, I needed to make sure I was only using the best section of each wood, you'll often find the ends of pieces will be slightly watered damaged or splintered - so best to chop off those sections.
I used a drop saw to cut my pieces but a handsaw would work as well :) I also didn't cut the top pieces of the table down to their exact measurements as I thought it would be more finished if I did it right at the end, once they had been nailed to the frame (I'll explain more in step 8).

Step / 3 Sand and Plane
Sand and plane all the pieces whilst wearing a dust mask (reclaimed wood can have a toxic coating) to remove any bumps or possible splinters in the wood. We'll be painting and sealing our desk so you don't have to worry about any health hazards with the finished piece :)

Step /4 Assemble 
Lay your 4 pieces together (these will make the base of the frame) and measure once more to make sure everything is nice and square, if it is, clamp your pieces together (90 degree clamps are amazing!) put some wood glue in between the joins (to make it more sturdy) and then drill 1 holes in each join. I pre-drilled a hole using my power drill and then with my screwdriver, twisted the screw into the hole.

Step /5 Lay your top plank pieces out
If you're using pallet wood for the top, lay down the pieces so they fit best together both for aesthetic purposes as well as even-ness. A lot of pieces will have weird bows (most of which should be corrected when attached to the frame) but it helps to piece them together as even as you can at this point. Since I'm painting my desk I wasn't too worried about mismatched colours but then this could add to your overall decision making if you choose to keep your piece unpainted.

Step /6 Mark the first plank and seal edges
I marked the very middle plank to the middle of the frame making sure it was nice and straight - this would become the guide for the following planks. At this point I also gave the middle plank a quick sand and (because I'm really pedantic) I also put some satin sealer on the edges because I knew once put together I wouldn't be able to apply paint there. I think you could definitely skip the sealer step but I just wanted to make sure that in 10 years the piece was still standing

Step /7 Nail planks onto frame 
Once the sealer was dried, I put my middle plank back to the middle of the frame within the mark lines, put some wood glue where the middle plank would touch other wood and then drilled two holes into both ends that I would then put nails into – I found drilling the hole first makes hammering much easier! You continue this process till all the planks are nailed onto the frame


sand/seal/dry/glue/drill/hammer AND R-E-P-E-A-T!

Step /8 Trim the planks to the frame
Once all the top planks have been nailed to the frame it's time to trim the excess. I used a table bench saw to do this but you can also use a jigsaw or even a hand held saw. This is also the part I was talking about in step 2 when I said I didn't bother cutting the top pieces down to their exact size because they would be trimmed in this stage!

Step /9 Even-ness
Putty up any holes with some wood filler (or make your own using sawdust and PVA glue) let dry overnight and then it's time to get everything beautiful and even. My tools I used at this point are a sander, plane and chisel. You may want your table rustic but because I'm using mine as a work desk (with a computer and mouse), I wanted everything level and even and smooth.


This took me several hours before everything was level enough and then I went to town with a power sander to make everything smooth. I also went back and filled some small holes I had missed and then sanded down the whole top again for perfection! I spent so long on this step and even after the many hours, my desk still has an overall rustic vibe to it.  It is very smooth to touch, the mouse works just fine on top but I believe if you're using pallet wood for the top you have to expect a slight rustic appeal :)

TIPS
* use gloves (gardening gloves are a-okay :P) when using a manual screw driver to prevent blisters
* buy a few more screws then you actually need to prevent going back and forth to the hardware.
* use a drill bit slightly larger than the screw (but the same length) to drill out the hole BUT...
* when nailing use a drill bit slightly smaller than the nail and only pre-drill about a quarter of the nail's length – just enough to get your nail started on the right path 

I hope Part 1 was easy to follow, I'll be back with Part 2 which will talk through how to make the legs! Any questions, just leave a comment below - I'm happy to answer them for you.
read more "Building A Desk - THE TABLE TOP - Part 1"