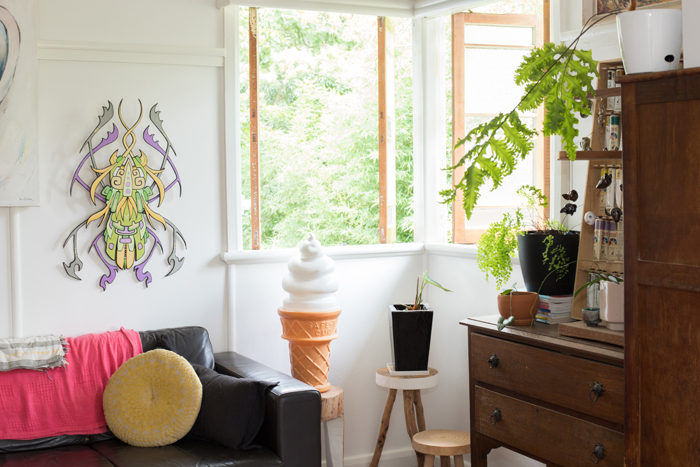
Showing posts with label fibro house reno. Show all posts

Tuesday, April 6, 2021

First Home - Reno Update

So the other week I shared the dining/lounge reveal but I realised I haven't been sharing much else and a lot has happened! We pulled down our back and front entrance (too much cement damage!), repaired and painted our 2nd bedroom and hallway, got solar installed, and painted all our doors.  I still want to get a bunch of nice finished photos but today I'm sharing the before shots!

painted reno
I shared the completed lounge/dining and before shots previously but as a bonus, some during photos!

diy painting

diy reno

young couple home renoTeam work!

timber casement window
A dream was seeing these casement window fixtures scrub up (previously covered in paint!) 
Although (a bad dream!) having to remove the paint :P

painted dining room
Freshly painted dining room :)

back porch
This is a shot I took when we first moved in and you can see the cement back porch.  I think it's super cute with its little curve but it was falling to pieces so we had to remove it!! So many trips to the dump carting heavy concrete (not fun!)

excavated cement porch
ARGH!

back patio in progress
It looks absolutely terrible now but it will eventually have a big deck that will wrap around we just need to get on top of the bamboo battle first! One thing at a time :P

removing paint off doors
I made it my personal mission to strip, prep, and paint all the doors in the house.  It nearly broke me.

prepping door to paint

removing old paint
Looks kind of fun and easy but the job ended up being mammoth 

cleaning door hinges
All the fittings were covered in paint.  I tried to capture it above but I think the next three photos do a better job!

old paint door hinge
The previous painters definitely didn't tape up their doors when painting :P

cleaning door hinge
The first result after scraping off as much paint as I could!

cleaned door hinge
The final result after loads of sanding! 
Isn't it shiny and pretty :) :)

tamale red front door haymes
I still need to take shots of all the finished doors but for now, here are the front and back doors awaiting their second coat (stuck painting inside because of rainy weather).  The colour is Tamale red by Haymes Paint.  The photo doesn't do a great job at capturing the colour, the true to life shade is a bright solid orange :) You can also spy our freshly painted hallway.
solar installers
After watching the David Attenborough's doco 'A life on our planet', Ben and I were inspired to get our butts into action and organise solar.  So glad we did!

solar panels
Isn't it pretty!! You can also spy one of the windows sanded back, that is the window belonging to our second bedroom.   
We're sanding back and varnishing each window as we slowly move through the interior reno :)
painting second bedroom
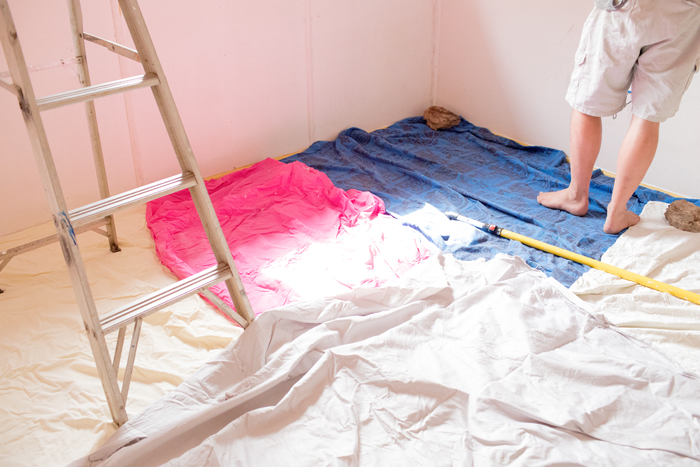
Getting ready to paint the 2nd bedroom - yes rocks holding down our drop sheets :P

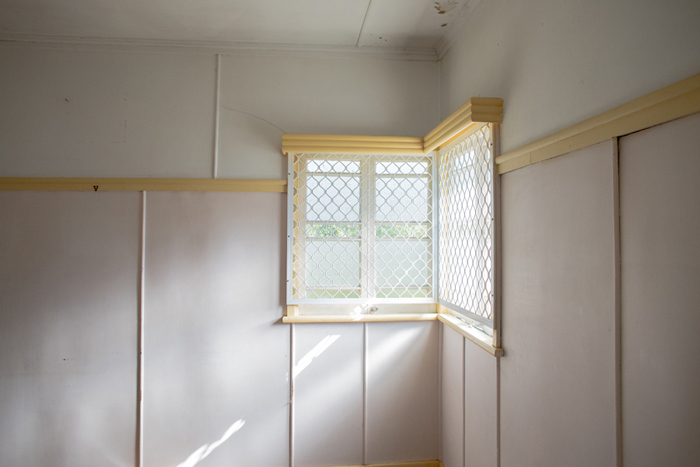
second bedroom before shot
Goodbye pink and yellow!

ben painting second bedroom
The second bedroom needed the least work of all our rooms just some patching and light sanding.  We actually painted this bedroom and the hallway at the same time, so what started out as a little paint job ended up being a mammoth one!

bedroom mould stains
You can see a very unattractive mold stain on the bedroom roof!
finished white bedroom
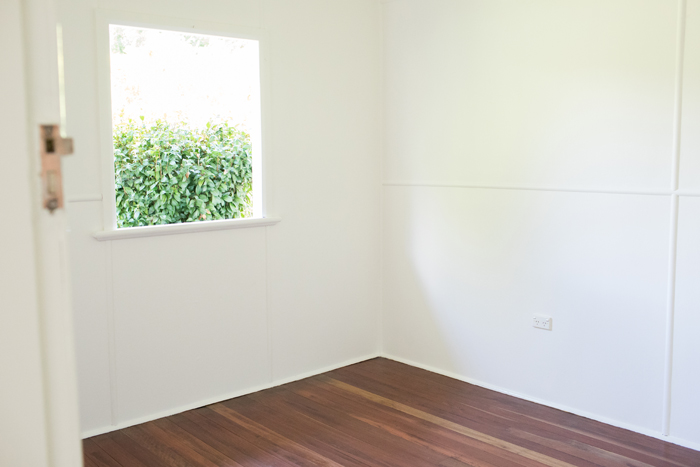
Wa-Lah! So nice and fresh, just needed the window frame to be screwed back in at this point :)


front cement ramp
Our previous front entry ramp.  This is one of the first projects we completed.  Actually, it was a solo Ben job with assistance from his friend Drew with ramp construction :) Despite the concrete being in terrible condition, Ben and I became accustomed to the ramp entrance so we decided to keep this style, instead of going with stairs.

concrete cancer
Close up of all the damage.  We actually had to step on strategic panels to be able to close the door properly :P

jackhammer front cement ramp
Ben bought this jackhammer second hand.  It ended up being a money saver because after using it for the front and back entrance, he resold it :)

timber front ramp
The new ramp.  I absolutely love the plain pine but since it's out in the weather it needed to be sealed.  Ideally, I wanted a neutral sealant but when we went to the shop, the clear stains all had a yellowish tinge, so we made the bold move to go black.

black varnished front ramp
I love the black BUT it does pick up dirt and probably not the best choice with a dog and two cats in the mix.  Maybe in the future, we'll replace the pine with darker hardwood planks that wouldn't look terrible with a yellow-tinged stain *shrugs*

Right now our current home projects include battling bamboo and trying to get it cleared so we can start out deck.  I'm also digging out our back eating area (that was just a tad too small) and once the rain eases we're going to make a start on our master bedroom which needs a lot of work and will force our mattress out into lounge until we finished it!
read more "First Home - Reno Update"

Tuesday, February 23, 2021

Dining/Lounge Reveal - Before/After

I'm super excited to share what we've been working on for the last few months - our lounge/dining reno! I've included the before shots at the bottom which hopefully capture all the things we had to do, from ripping out and replacing termite-eaten skirting, sanding the floors, filling many many gaps, plastering, and then finally painting.  So glad we have it ticked off now, it's such a happy friendly space to be in!  I learnt a lot of skills in the process and the end vision turned out even better than I had imagined :)

australian lounge renovation
If there's light I'll probably place a plant in it :P

aussie lounge reno
One of the things we were most excited about was getting our art up on the walls!

sanded window frames qld reno
We removed all the windows and sanded and varnished them to reveal their original timber.  Just to get the windows off (very old rusted screws!) took hours and hours and then three days for one panel to have sanded and varnished.   The lounge/dining has 8 window panels in total and to finish our house we have 16 more to do! yikes!

qld reno details
So fun to get to display our plants and art!

qld fibro cottage reno
This is the view from the dining looking back into the lounge, it's where we eat dinner and where our guests hang out :)

lounge book shelf
SHELVES! Oh my gosh, so excited to put these up and style them.  They were one of the first things we purchased for the home.  My original thinking was that it would take a few days to prep the rooms and have them painted - ha! So wrong! These shelves sat for over a year waiting patiently to be put up.

shelfie details
Styling fun!

bookshelf styling
We painted our ceilings, walls and trim in the same white.  The paint is 'white on white' by Australian paint company Haymes.  I give that paint two solid thumbs up!  The walls were painted in a satin sheen and the trim in gloss. The only annoyance was doing the trims in oil-based paint because we weren't sure of the previous paint finish.  The oil gives an amazing thick glossy finish but it's horrible to apply. Luckily the trims are the smallest paint job to do :)

shelf detailThe delight of unpacking all my art and trinkets

shelf styling inspo
I'm no interior photographer and found it challenging to have the windows and inside properly exposed.  Flash ended up being my friend.

shelf styling detail

plants on bookshelf

pine lounge bookshelf

qld dining room reno
This is looking into our dining room via our lounge.  It's where we have our cat bowls and their scratching post and the cat tree that I made.  This view also includes the lovely little curved wall feature in our home :)

mismatched dining room chairs

gallery wall

modern qld artist home
The last view, back in the lounge looking over at the other wall. We will most likely replace the modern light switches with some reproduction period switches.  As our friend says, it's the little things people. Oh and potentially in the future, we'll put up a projector with the screen rolling down between the lounge and dining divide for an instant movie cinema!

bright art filled home

Now onto the before photos...

qld dining room reno
The previous paint scheme was cream and pink with yellow trim. This shot is from the lounge looking into the dining, where we now have the shelves up on the left-hand wall.

qld dining lounge reno
From the dining looking into the lounge, where we have our couch along the back wall.

mould on roof
This is just one shot but it shows the previous water damage + mould and paint peeling.  Loads of prepping needed to get the walls and ceiling ready for paint.

qld termite damage

diy qld reno
When we first bought the place, I went through the whole house with a hammer, knocking on every part to see where the termite damage was and to isolate what needed replacing.  We already knew about the termite damage before we bought the house, so it wasn't a shock just a pain to deal with.

repairing skirting
Lots of damage!

termite damaged skirting
They had a good old munch

lounge dining before
Lounge to dining view and where our roll-down movie screen would go :)

badly patched hole
Gross hole in the wall that was stuffed full of old newspaper.

queensland reno diy
I used to hate those ceiling light plates but I'm quite fond of them now.  Most likely would of had a covering of some sort.

window security screens
The very very first thing we did, after getting our keys, was to take off all the security screens from the windows - super ugly!

sanding floors
Oh and never forget the mammoth job of sanding and re-doing our floors - arghh! 

Since completing the lounge/dining we've finished the hallway and the second bedroom and I've just finished painting the doors.  Our next big project is the main bedroom which needs loads of termite work, so we're having a little breather before we embark upon that one!  I'll make sure to keep sharing as we move along :)

read more "Dining/Lounge Reveal - Before/After"