Showing posts with label renovation before and after photos. Show all posts

Tuesday, November 9, 2021

Bedroom Reveal Before/After

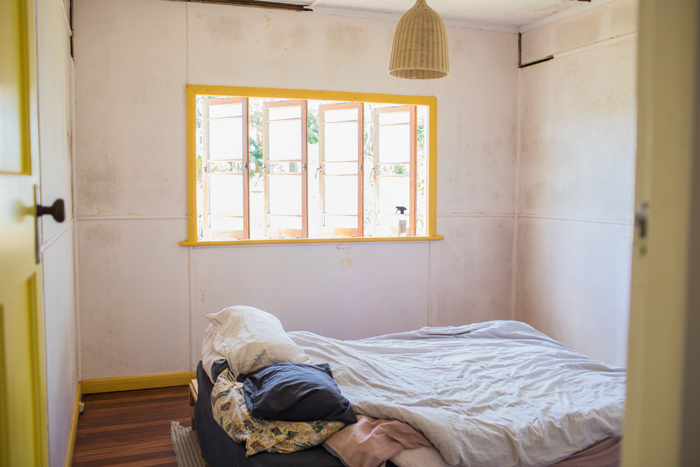
I am so ridiculously happy to have our bedroom reno finished! It took us about 4 weeks to finish, which is way too long but we had work/life in between! The first picture below is the finished bedroom and then a whole bunch of before pics.  When people previously came around to visit I was really embarrassed to show them this room - it was soooo bad! Slightly terrified to show you but it does make the after photos that much better!

bedroom revealThe pretty after!

australian reno
The BEFORE - although at this stage we had cleaned the mould - the photos will get worse!

ben doing reno
Ben doing the ripping!

termite skirting mess
As we pulled down the skirting, all the termite eaten wood came crumbling down - big mess!

ben black and white
Big job!

peachy on drop sheet
The cats loved all the drop sheets though - instant playground!

reno reality
Since I'm normally set up in the bedroom, I had to move my desk and belonging out into the lounge

living through a reno
Chaos!

bedroom before photo
This was taken after we had moved everything out and the crazy amount of mould revealed itself in the full!

pre reno walls
The walls needed so much prepping!

mould on wallsCleaning, scrapping, gap filling and plastering!

wall cracks

bedroom mould
I hate even looking at these mould photos! Super gross!

renovation before
THE BEFORE and the...

after bedroom renoAFTER!
So fresh! Very grateful we finally kicked out butts into gear and made this happen

white light bedroom
So nice to sleep in here now :)

yellow door bedroom
Our yellow door!

shelf above bed
We're going to add a few more plants to that shelf, we want to make some nice ceramic planters for them first though :)

pink wardrobe bedroom
I didn't actually get a good shot of the desk but it's the reason the reno happened.  This desk was free off fb marketplace and as I was moving my old desk out and the new one in, I started to clean the mould off on the wall behind.  It freaked me out that I was only doing this one patch of wall and not cleaning the whole bedroom and as they say, the rest is history.

bright bedroom
So nice to walk into the bedroom now :) No more shame!

pink painted furniture
LOVE!

Eventually I'm going to move my stuff out to a studio on the verandah (when that gets built) but for now the main bedroom exists in this configuration :) 

Paint Colour Info: We painted the ceiling, walls, and trim in 'white on white' by Australian paint company Haymes. The walls were painted in an acrylic satin sheen and the trim was in an oil gloss. The pink wardrobe was painted using a local chalk company, Canterbury Blue and the colour was 'pixie pink'.
read more "Bedroom Reveal Before/After"

Tuesday, February 23, 2021

Dining/Lounge Reveal - Before/After

I'm super excited to share what we've been working on for the last few months - our lounge/dining reno! I've included the before shots at the bottom which hopefully capture all the things we had to do, from ripping out and replacing termite-eaten skirting, sanding the floors, filling many many gaps, plastering, and then finally painting.  So glad we have it ticked off now, it's such a happy friendly space to be in!  I learnt a lot of skills in the process and the end vision turned out even better than I had imagined :)

australian lounge renovation
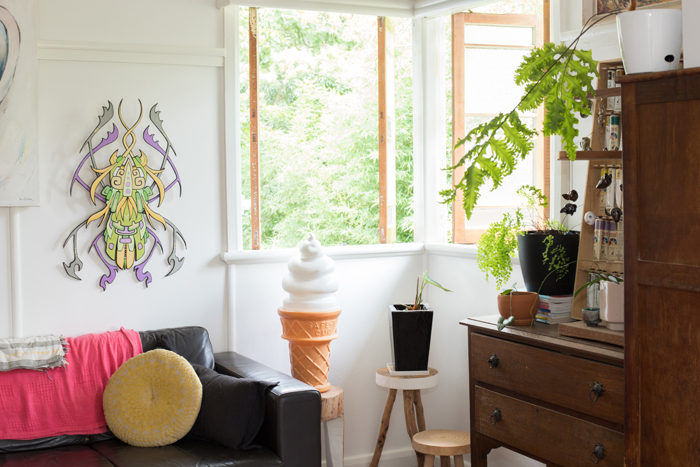
If there's light I'll probably place a plant in it :P

aussie lounge reno
One of the things we were most excited about was getting our art up on the walls!

sanded window frames qld reno
We removed all the windows and sanded and varnished them to reveal their original timber.  Just to get the windows off (very old rusted screws!) took hours and hours and then three days for one panel to have sanded and varnished.   The lounge/dining has 8 window panels in total and to finish our house we have 16 more to do! yikes!

qld reno details
So fun to get to display our plants and art!

qld fibro cottage reno
This is the view from the dining looking back into the lounge, it's where we eat dinner and where our guests hang out :)

lounge book shelf
SHELVES! Oh my gosh, so excited to put these up and style them.  They were one of the first things we purchased for the home.  My original thinking was that it would take a few days to prep the rooms and have them painted - ha! So wrong! These shelves sat for over a year waiting patiently to be put up.

shelfie details
Styling fun!

bookshelf styling
We painted our ceilings, walls and trim in the same white.  The paint is 'white on white' by Australian paint company Haymes.  I give that paint two solid thumbs up!  The walls were painted in a satin sheen and the trim in gloss. The only annoyance was doing the trims in oil-based paint because we weren't sure of the previous paint finish.  The oil gives an amazing thick glossy finish but it's horrible to apply. Luckily the trims are the smallest paint job to do :)

shelf detailThe delight of unpacking all my art and trinkets

shelf styling inspo
I'm no interior photographer and found it challenging to have the windows and inside properly exposed.  Flash ended up being my friend.

shelf styling detail

plants on bookshelf

pine lounge bookshelf

qld dining room reno
This is looking into our dining room via our lounge.  It's where we have our cat bowls and their scratching post and the cat tree that I made.  This view also includes the lovely little curved wall feature in our home :)

mismatched dining room chairs

gallery wall

modern qld artist home
The last view, back in the lounge looking over at the other wall. We will most likely replace the modern light switches with some reproduction period switches.  As our friend says, it's the little things people. Oh and potentially in the future, we'll put up a projector with the screen rolling down between the lounge and dining divide for an instant movie cinema!

bright art filled home

Now onto the before photos...

qld dining room reno
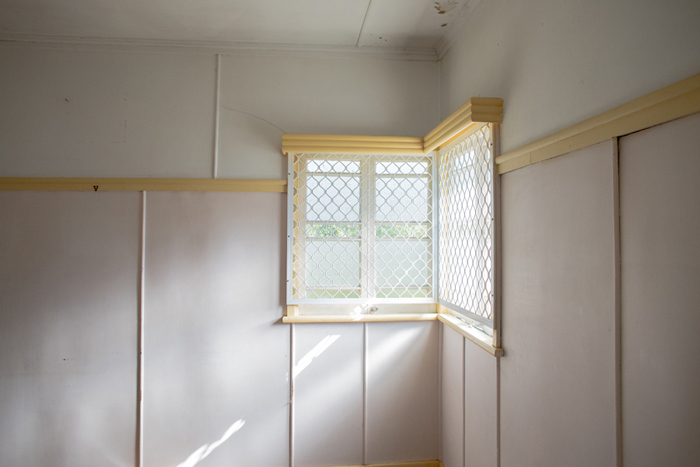
The previous paint scheme was cream and pink with yellow trim. This shot is from the lounge looking into the dining, where we now have the shelves up on the left-hand wall.

qld dining lounge reno
From the dining looking into the lounge, where we have our couch along the back wall.

mould on roof
This is just one shot but it shows the previous water damage + mould and paint peeling.  Loads of prepping needed to get the walls and ceiling ready for paint.

qld termite damage

diy qld reno
When we first bought the place, I went through the whole house with a hammer, knocking on every part to see where the termite damage was and to isolate what needed replacing.  We already knew about the termite damage before we bought the house, so it wasn't a shock just a pain to deal with.

repairing skirting
Lots of damage!

termite damaged skirting
They had a good old munch

lounge dining before
Lounge to dining view and where our roll-down movie screen would go :)

badly patched hole
Gross hole in the wall that was stuffed full of old newspaper.

queensland reno diy
I used to hate those ceiling light plates but I'm quite fond of them now.  Most likely would of had a covering of some sort.

window security screens
The very very first thing we did, after getting our keys, was to take off all the security screens from the windows - super ugly!

sanding floors
Oh and never forget the mammoth job of sanding and re-doing our floors - arghh! 

Since completing the lounge/dining we've finished the hallway and the second bedroom and I've just finished painting the doors.  Our next big project is the main bedroom which needs loads of termite work, so we're having a little breather before we embark upon that one!  I'll make sure to keep sharing as we move along :)

read more "Dining/Lounge Reveal - Before/After"